Crear un archivo JAR con Eclipse
- Elija el archivo Java en Project Explorer o en la vista Navigator.
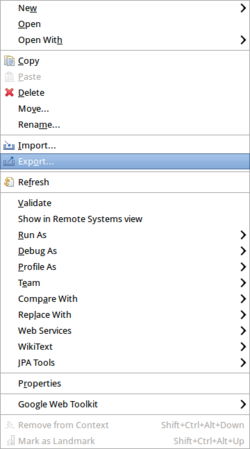
- Haga clic con el botón derecho (se mostrará el menú contextual) y elija “Export”.
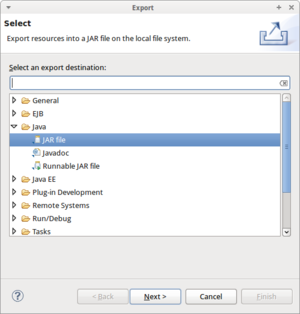
- Elija Java -> JAR file.
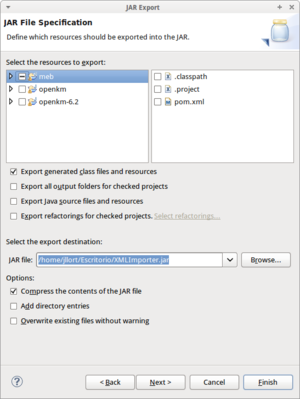
- Seleccione la carpeta de destino, por ejemplo C:\openkm-dev\jar\your-class.jar.
- Haga clic en Next.
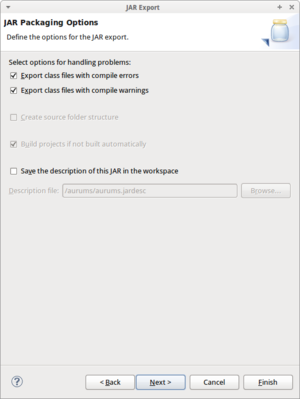
- Haga clic en Next.
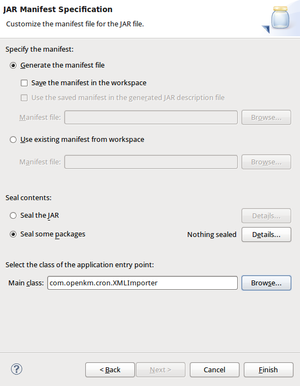
- Paso opcional. Si su clase java implementa “public static void main(String[] args)” debe elegir su clase java como clase del punto de entrada.
- Haga clic en Finish.
Imágenes
Sección titulada «Imágenes»Seleccione el archivo que se exportará como JAR. Haga clic con el botón derecho y seleccione la opción “Export”.
Seleccione la opción de archivo “.jar” y haga clic en el botón “next”.
Seleccione las “Java classes to be included” que se incluirán en el archivo JAR y haga clic en el botón “Next”.
Haga clic en el botón “next”.
Seleccione la “Main class” y haga clic en el botón “Finish”.
Archivo JAR de ejemplo
Sección titulada «Archivo JAR de ejemplo»Requisitos:
- La clase debe implementar el método “public static void main(String[] args)”.
package com.openkm;
import org.slf4j.Logger;import org.slf4j.LoggerFactory;
public class Test {    private static Logger log = LoggerFactory.getLogger(Test.class);
    public static void main(String[] args) {        System.out.println("Test sample");    }}